
Have you ever encountered the frustrating situation where your Windows 10 computer refuses to enter sleep mode? As a computer user, you understand the importance of conserving energy and giving your machine a break when not in use. However, when faced with an uncooperative system that resists entering sleep mode, it can be exasperating. Thankfully, there are several troubleshooting steps you can take to resolve this issue and regain control over your PC’s sleep function. In this comprehensive guide, we will explore the possible causes behind the “Windows 10 Won’t Sleep” problem and provide effective solutions to help you fix this issue once and for all.
Check Power Settings
The first step in troubleshooting a Windows 10 sleep issue is to ensure that your power settings are configured correctly. Here’s how you can do it:
- Access Power Options: Open the Start menu and search for “Power Options.” Select the corresponding result to open the Power Options window.
- Select a Power Plan: In the Power Options window, select an appropriate power plan from the available options. If you’re unsure which plan to choose, select “Balanced.”
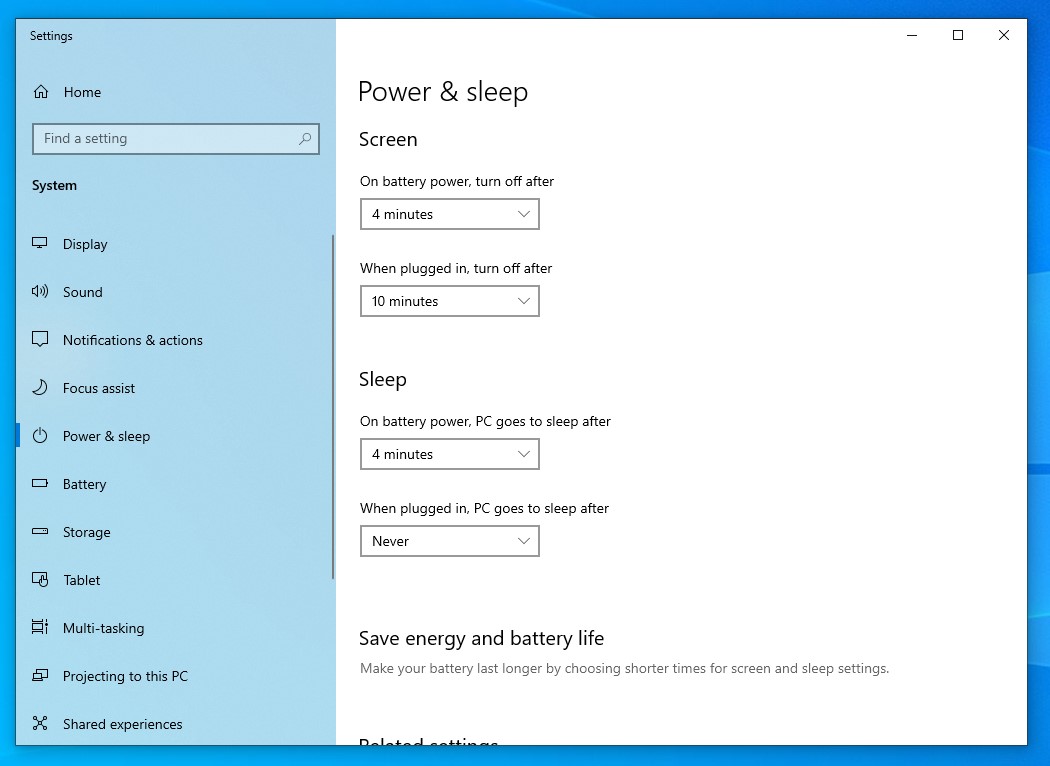
- Adjust Plan Settings: Click on “Change plan settings” next to your selected power plan. From here, configure both “Turn off the display” and “Put the computer to sleep” settings according to your preferences.
- Set Advanced Power Settings: To access advanced power settings, click on “Change advanced power settings.” A new dialog box will appear.
- Ensure Proper Sleep Configuration: Expand the “Sleep” option in the dialog box and verify that all sub-options are set correctly. Specifically, check if values for “Allow hybrid sleep,” “Hibernate after,” and other relevant options align with your desired behavior.
Update Drivers
Outdated or incompatible drivers can sometimes interfere with your computer’s ability to enter sleep mode. To address this, follow these steps to update your drivers:
- Open Device Manager: Press the Windows key + X and select “Device Manager” from the menu that appears.
- Expand Driver Categories: In the Device Manager window, expand each category and look for any devices marked with a yellow exclamation mark or displaying an error message.
- Update Drivers: Right-click on the problematic device(s) and select “Update driver.” Choose the option to automatically search for updated driver software. If an update is found, follow the on-screen instructions to install it.
Disable Wake Timers
Sometimes, scheduled tasks or wake timers can prevent your computer from entering sleep mode. Disabling these wake timers might resolve the issue. Here’s how you can disable them:
- Access Power Options: Open the Power Options window once again by following the steps mentioned earlier.
- Change Advanced Power Settings: Click on “Change advanced power settings” to open the advanced power settings dialog box.
- Disable Wake Timers: Expand the “Sleep” option and then expand “Allow wake timers.” Set both “On battery” and “Plugged in” options to “Disable.”
Check Power Troubleshooter
Windows 10 offers built-in troubleshooters that can automatically detect and fix various issues, including sleep mode problems. To access the Power Troubleshooter:
- Open Settings: Press Windows key + I to open the Settings app.
- Navigate to Update & Security: In Settings, click on “Update & Security.”
- Access Troubleshoot: On the left-hand side of the Update & Security window, click on “Troubleshoot.”
- Run Power Troubleshooter: Scroll down until you find “Power” under Troubleshoot and click on it. Then, select “Run the troubleshooter” and follow the on-screen instructions.
Disable Fast Startup
Fast Startup is a feature in Windows 10 that allows your computer to boot up faster after shutting down. However, it can sometimes interfere with sleep mode functionality. Disabling Fast Startup might help resolve the issue:
- Access Power Options: Open the Power Options window once again.
- Select What Power Buttons Do: Click on “Choose what the power buttons do” from the left-hand side menu.
- Change Settings That Are Currently Unavailable: At the top of the next screen, click on “Change settings that are currently unavailable.”
- Disable Fast Startup: Scroll down to find “Turn on fast startup (recommended)” and uncheck the box beside it.
- Save Changes: Click on “Save changes” to apply the new setting.
In conclusion, encountering issues with your Windows 10 computer not entering sleep mode can be frustrating, but rest assured there are multiple solutions available to address this problem. By following these troubleshooting steps—checking power settings, updating drivers, disabling wake timers, running power troubleshooters, and disabling fast startup—you should be able to resolve the issue and enjoy uninterrupted sleep mode functionality once again!